How to make DIY acoustic panels for a home office
Build diy acoustic panels for your home office using wood frames and fiberglass insulation to help reduce room echo on a rough budget.
Filed by Jess Underhill 8 min
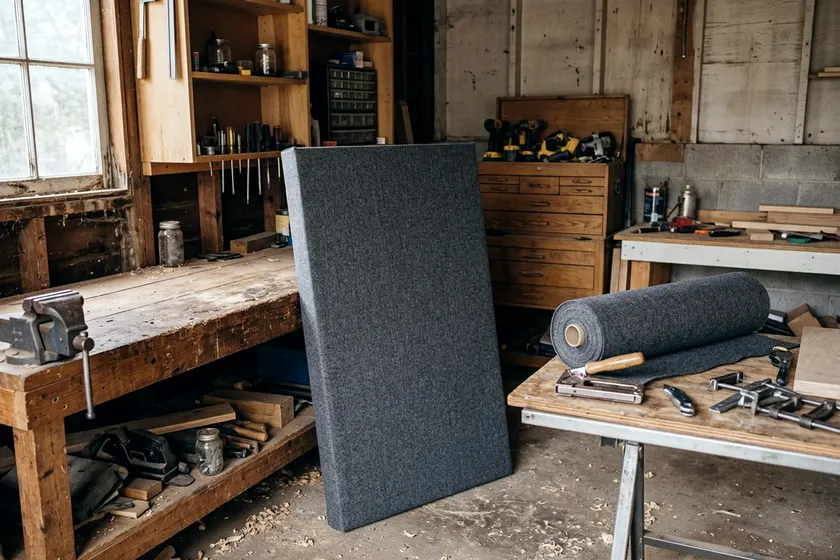
You can build DIY acoustic panels for a home office with a simple wood frame. Drop in a rigid insulation board and wrap the assembly in breathable fabric. Hang these frames on your walls at the first reflection points to absorb mid and high frequencies. This can cut room echo and make speech clearer on calls.
Decide how many panels the room needs
Figure out your target wall coverage before you buy lumber and fabric. Acoustic treatments absorb sound waves as they bounce off the hard drywall. Keep in mind that absorption is not isolation. That difference explains how soundproof panels work.
These panels stop sound from bouncing around inside the space. They will not stop the lawnmower noise outside from coming through your window. For that, you need to review ways to block noise.
Clap your hands loudly in the center of your office and listen to the high ringing sound that follows. DIY acoustic panels can help reduce that flutter echo.
A room with bare drywall, hardwood floors and large windows suffers the worst echo. If your space sounds hollow, you need more wall coverage. A room with thick carpet needs fewer panels.
Plan a small batch of panels for a typical spare bedroom. If you are designing a home office, set aside wall space for panels.
Cover the first reflection points on the left and right walls. Place the rest on the wall directly behind your desk chair. You can always build another batch later.
Measure the bare wall space to see what fits. Rigid fiberglass boards come in the sizes the maker lists, so check them before you size the frames. Building frames to match a board size wastes little insulation.
Matching the board size also means less cutting of the glass fibers. If a full height panel looks too large, cut the boards to make smaller squares.
Gather a frame, fill, breathable fabric and hanging hardware
You need basic hardware store supplies and a few yards of fabric. Keep the design simple to keep costs down. A basic friction fit frame works well and requires very few tools.
Collect these materials for the project:
- Wood boards for the frame outer edges.
- Rigid fiberglass insulation boards for the sound absorbing core.
- Breathable fabric to wrap over the front and sides.
- Wood screws to hold the frame corners together.
- Heavy-duty staples and a staple gun to secure the fabric.
- Picture wire, D-rings and wall hooks to hang the finished pieces.
Choose standard pine boards for the frame. Pick straight boards with no bad twists or huge knots.
Test your fabric by holding it up to your mouth and blowing through it. If you feel your breath on the other side, sound waves can pass through the weave. Cotton, muslin, canvas and burlap often work if they pass this test.
Avoid heavy vinyl or tight synthetic weaves. They can reflect sound back into the room before the insulation can catch it.
You need a few basic hand tools to put the materials together. A hand saw or circular saw handles the wood cuts. An electric drill makes driving the screws easy.
Keep a pair of sharp fabric scissors nearby for trimming the corners. A heavy-duty staple gun works best. Ordinary office staplers lack the power to drive metal into solid pine.
Choose the right acoustic insulation fill
The core does the actual work. You need a dense, rigid acoustic material rather than the soft pink fiberglass batts used inside exterior walls. Fluffy batts can slump down inside the frame over time. Rigid boards hold their shape better.
Owens Corning lists its Type 703 fiberglass insulation board in thicknesses from 3/4-inch to 4 inches. Thicker boards generally absorb more at lower frequencies, while thinner ones stick out less. A medium thickness from that range is a reasonable starting point for a home office. You can layer thinner boards to build up the depth.
Owens Corning lists a 3.0 pcf density and flame spread and smoke developed ratings below 25 and 50 under ASTM E84 for its black faced acoustic board. This black facing helps hide the yellow fiberglass behind thin or light-colored fabrics.
One common rating shows how well these materials absorb sound. The GSA defines the noise reduction coefficient (NRC) as a single number rating of how much sound a material absorbs, averaged across 250, 500, 1000 and 2000 Hz. Look for a high NRC rating when you compare fill materials.
Build the wood frame
Lumber yards sell pine boards in standard lengths. Standard pine boards often cut into frame sides with little waste. Plan your cuts on paper before you run the saw.
Cut your pine boards to build a box around the insulation. The inner dimensions of the frame must match the outer dimensions of your rigid board. A tight fit holds the insulation in place without glue.
Measure the insulation board yourself. Do not trust the printed label. Cut the top and bottom boards to the exact width of the insulation.
Cut the side boards to the height of the insulation plus the thickness of the top and bottom boards. This allows the sides to overlap the ends.
Set the pieces on a flat garage floor or a wide workbench to check the fit. An uneven surface twists the frame while you screw it together. A twisted frame sits poorly against the wall.
Pre-drill holes through the side boards into the ends of the top and bottom boards. Pine splits easily when you drive screws near the edge. A pilot hole clears a path for the screw threads.
Drive two wood screws into every corner. Use a carpenter square to check the angles. The frame must be perfectly square so the insulation board drops straight in. Wood glue is optional.
Handle the insulation fill as its maker instructs
Fiberglass can shed tiny fibers that may irritate skin, eyes and lungs. Treat it with respect and follow the manufacturer's handling instructions and safety data sheet.
Work outdoors or in a well-ventilated garage. Wear a long-sleeve shirt, long pants, work gloves, safety glasses and the respiratory protection the manufacturer specifies. Keep the workspace clear of kids and pets. Move slowly to avoid kicking up dust.
Slide the fiberglass board into the assembled wood frame. Push it down gently until the front face sits flush with the front edge of the wood. The tight fit keeps the board secure.
If you need to cut the board to fit a custom frame, use a sharp utility knife and a metal straight edge. Score the surface gently and press harder on the second pass to cut all the way through.
Do not tear or snap the board. Wipe down the wood frame with a damp cloth to remove any stray glass fibers before you take the assembly inside. Check the manufacturer's advice for washing your work clothes.
Wrap and staple the fabric tight
Fabric choice determines how the finished panels look. Buy extra yardage. Wrapping around the sides and back consumes more material than you expect. Add a wide border of extra fabric to every side of your panel measurement.
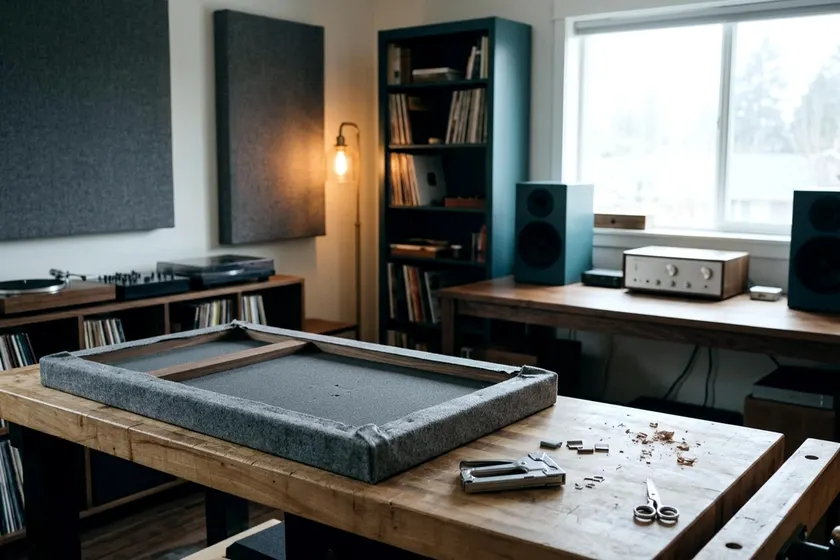
Iron your fabric before you start. Wrinkles ruin the clean look of the finished piece. Lay the ironed fabric face down on a clean floor or a large dining table. Place the loaded wood frame face down in the center of the fabric.
Stapling takes patience to keep the fabric drum tight, with no sagging or bunching. Start on one long side, fold the fabric over the back of the wood frame, and drive one staple into the center of the wood.
Walk around to the opposite side, pull the fabric tight across the frame and drive one staple into the center of the wood. Move to a short side, pull the fabric tight, and place a staple in the center. Do the same on the final side.
Work your way out from the center staples toward the corners. Place a staple, move to the opposite side, pull tight, and place another staple.
Space the staples a few inches apart. Keep checking the front of the panel to ensure the fabric remains straight. Stop stapling a few inches before you reach the corners.
Fold the corners neat and flat
Corners trap excess bulk. You need a flat fold so the panel sits flush against the drywall. Pull the fabric point straight back toward the center of the frame. Staple that point down.
Take the loose fabric on the left side and fold it tightly over the corner. Staple it to the wood.
Take the loose fabric on the right side, fold it over the first fold, pull tight and staple. Trim any excess fabric with scissors.
The corner should be smooth and secure. Repeat this step for all four corners.
If the corner feels too thick after stapling, you can carefully trim away the inner layers of fabric. Do not cut too close to the staples. A weak seam will fray and split open over time.
Hang the panels at first reflection points
Your finished acoustic panels act like large picture frames. Attach a D-ring to the upper back of the left frame side and a matching D-ring to the right side.
Thread heavy picture wire through the rings. Twist the wire ends securely so they do not slip.
Do not hang the panels at random. They do the most good at the first reflection points.
Your speakers sit at the front of the desk, pointing toward your ears. Sound travels out in a cone, and some of that sound hits your ears directly.
The rest travels past you, strikes the hard side walls, and bounces back to your ears a fraction of a second later. This delayed bounce muddies the audio.
Placing absorption at these exact bounce points helps cut the echo. Sit in your office chair in your normal working position.
Have a friend hold a hand mirror flat against the side wall. Ask them to slide the mirror slowly along the wall at your seated ear height.
Watch the mirror from your chair. When you can see the reflection of your desk speaker in the glass, tell your friend to stop, as that spot is your first reflection point.
Mark the wall with a pencil. Repeat the process on the opposite wall. These pencil marks are the horizontal centers for your first two side panels.
Hang the center of each frame directly over the mark. Weigh each finished panel and use hooks or anchors rated for more than that weight, driven into a wall stud where you can. If you have extra panels, center them on the wall behind your chair to catch the sound bouncing past your microphone.