Is a prefab office pod right for your backyard
Decide if a prefab office pod fits your backyard by checking required sizes, local building permits, foundation types, electrical power and climate control.
Filed by Jess Underhill 6 min
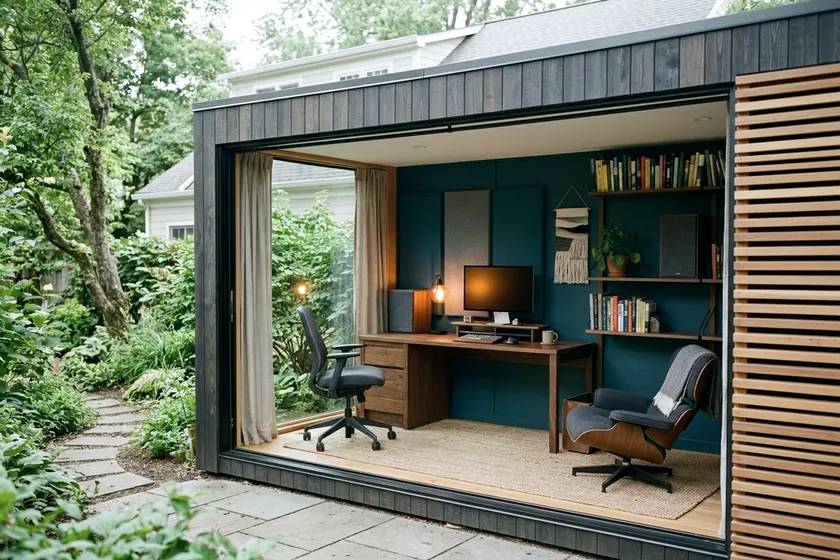
A prefab office pod is the fastest way to put a finished workspace in your backyard. Buying a ready-made structure spares you most of the on-site construction work. This path only makes sense if you have clear delivery access and room for a level foundation.
What a prefab outdoor office pod includes and what it leaves out
Most builders sell an outdoor office pod as a finished unit. The exterior walls arrive painted and the manufacturer seals the glass doors in place. The floors often feature durable luxury vinyl planks that resist scratches from rolling chairs. Factory workers install the electrical outlets, switches and interior lights before the truck ships.
You buy a finished room, but you still have to do the site work. The builder drops the pod on your prepared foundation. You then hire a local electrician to connect the structure to your house panel and you handle the trenching. This factory assembly is the main difference between buying a pod and taking the time to turn a shed into an office.
Some companies sell kit pods instead of fully assembled units. A kit arrives as flat panels stacked on a pallet. You and a friend bolt the floor, walls and roof together over a weekend. Kits are easier to carry into tight backyards, but you still have to caulk the seams and paint the trim.
Size the pod to your desk, chair and a second seat
You need enough floor space to sit comfortably and push your chair back. A small pod gives you a compact exterior footprint, but the wall thickness takes up space on every side. That leaves you with a noticeably smaller interior space.
A small pod still holds a standard rectangular desk against one wall. You have enough room to roll backward and reach a small filing cabinet. You can fit a secondary reading chair in the opposite corner. This layout feels cozy for one remote worker.
Look for a larger model if you want a small sofa or a large L-shaped desk. A bigger pod easily holds two desks facing the walls. Measure your existing furniture and tape the dimensions on your driveway to see how the layout feels. Leave plenty of clearance behind your seat so you have enough room for an ergonomic office chair.
Pay attention to the ceiling height as well. Many modern pods feature flat or slightly sloped roofs. A low ceiling can feel cramped once you mount a heating unit. Look for models with generous interior heights.
Check permits and setbacks with your local building department
City and county rules dictate where you can put a structure and how big it can be. You must ask your local permit office exactly what they require before you spend any money.
Rule source | Permit rule |
|---|---|
International Residential Code | No permit up to 200 square feet for a one story detached accessory structure |
Oakland, California | Permit needed over 120 square feet, or with any mechanical, electrical or plumbing work |
The International Residential Code model text exempts one story detached accessory structures from a building permit when the floor area does not exceed 200 square feet, but local codes can amend this. Many local building departments set stricter limits. Oakland, California, for example, requires a building permit for an accessory structure whenever mechanical, electrical or plumbing work is involved, and for any structure over 120 square feet.
Running electricity to your pod often triggers an electrical permit. This can apply even if the structure itself is small enough to avoid a general building permit. You have to submit your plans, pay the fees and schedule an inspector to look at the work.
Setback rules tell you how close the structure can sit to your property lines. Cities often require a clear gap between the pod and your property lines, and some residential zones require an even wider setback. Find your official survey pins or hire a surveyor to mark the boundaries.
Prepare a level foundation and clear delivery access
A pod needs a perfectly flat base so the doors open easily and the walls stay square. Manufacturers usually require a concrete slab, a crushed gravel pad or ground screws. The builder will tell you exactly what foundation they accept to keep their warranty valid.
A gravel pad enclosed by pressure treated lumber is often the cheapest option. You dig out the topsoil, lay down weed fabric and compact the crushed stone until it is completely level. Concrete slabs cost more and take time to cure, but they provide a permanent solid base. Ground screws work well on sloped yards where grading is difficult.
Delivery is often the hardest part of the process. A flatbed truck brings the fully built pod to your street and a heavy forklift moves it into your backyard. You need a path wide enough and tall enough to fit the machine and the structure. Walk the path and measure the distance between your house and your property fence.
You have to hire a crane to lift the pod over your roof if your side gate is too narrow. A crane rental adds a significant cost. You must also have clear overhead space away from power lines and large tree branches. A flat-packed kit you build on site is your only remaining option if crane delivery is impossible.
Plan power, lighting and internet before delivery
Your new room needs its own electricity for computers, lights and climate control. You have to hire an electrician to run a line from your main house panel to the backyard. This involves digging a trench deep enough to meet your local electrical code.
Ask the electrician to install a dedicated subpanel inside the pod or a dedicated breaker in your main house box. A laptop, a monitor and a phone charger together draw very little power. Heating and cooling equipment will draw much more power, so calculate those loads carefully with your electrician.
A pod usually comes with two or three standard wall outlets. You might want to ask the builder for outlets with built-in USB ports to charge your devices. Plan where your desk will go so you do not have extension cords running across the floor. You might need to learn a few ways to manage desk cables if the wall outlets are far from your computer.
Put an Ethernet cable in the same trench while the ground is open. Run outdoor rated Cat6 cable inside its own separate conduit to keep it separate from the electrical power lines. A hardwired internet connection gives you much better speeds for video calls than a weak Wi-Fi signal. A mesh Wi-Fi system is your next best choice if you cannot run a wire.
Choose heating and cooling for your climate
Backyard offices get hot in the summer sun and cold in the winter wind. Some builders include a standard window air conditioner and a basic electric baseboard heater. These appliances get the job done, but they can be loud, and the noise shows up on conference calls.
A ductless mini split is a much better choice for a quiet work environment. ENERGY STAR says ductless mini splits need no ductwork and pair one outdoor unit with one or more indoor heads mounted on a wall or ceiling. The noisy compressor stays outside on the ground behind the pod. The indoor unit simply blows conditioned air across the room quietly.
These systems cost more upfront, but they can save money on your monthly electric bill. ENERGY STAR says certified mini splits use up to 60% less energy than standard home electric radiators. You will need a licensed HVAC technician to install the mini split and connect the copper refrigerant lines.
Insulation dictates how well your chosen equipment will perform. Look closely at the R-value of the walls, floor and roof before you buy. Large glass doors let in natural light, but glass offers poor thermal resistance, so ensure the builder uses double-pane windows. If you live in a cold region, pay extra for upgraded floor insulation to stop cold air from chilling your feet through the floorboards.