How to turn a shed into an office you can use all year
Build an office shed that stays warm, powered and connected all year round with clear steps for insulation, power, internet and climate control.
Filed by Jess Underhill 8 min
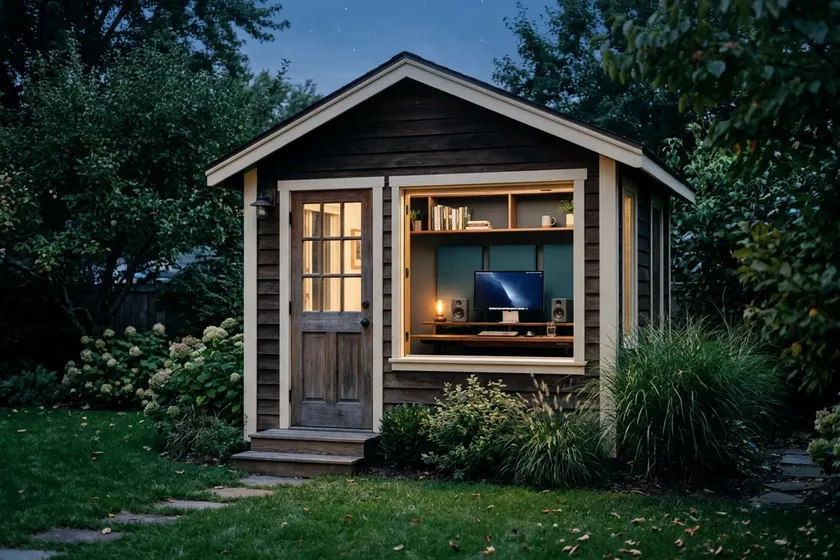
An office shed gives you a quiet workspace away from the main house. You can turn an empty wooden shell into a comfortable backyard office by planning the framing, running underground power and sealing out the weather.
Check your local building permits first
Building a shed office requires following municipal rules for structures and wiring. The ICC says the International Residential Code is a model code meant to be adopted under each jurisdiction's own laws, and some jurisdictions amend it to reflect local practices and laws.
The International Residential Code model text exempts one story detached accessory structures from a building permit when the floor area does not exceed 200 square feet, but local codes can amend this, so check with your local building department. You might face zoning rules that dictate how close a structure can sit to the property line.
Federal Way, Washington, one jurisdiction that publishes its IRC exemptions, notes that work in critical areas such as wetlands and their buffers is not exempt from permits. Ask whether anything similar applies to your lot. Ask the building department about easements, septic lines and local limits on building height.
Electrical work brings a second set of rules. The NAHB says electrical codes are adopted by states and some cities and counties, and most states have adopted an amended version of the National Electrical Code. You need to know what your state allows a homeowner to do. Many places require a permit and an inspection for new circuits, so ask your local building department.
A homeowner association might also dictate roof pitch, siding materials and paint colors. Draw a site plan that shows property lines, the main house and the proposed shed. The building department and your association use this drawing to check your setbacks.
Pick a spot with power and drainage
Place your shed where water flows away from the walls. A low spot in the yard will trap rain around the foundation. Moisture can damage timber framing and wood siding. Find a flat, raised area or build up a gravel pad to create a level base.
A concrete slab costs more but keeps the wood out of the dirt. Concrete blocks placed on crushed gravel can offer a cheaper base. Tamp the gravel down so the blocks do not settle over time. Check the ground level with a long bubble level resting on a straight piece of lumber.
Keep the path to the house short. You will walk this route in the rain, wind and snow. A short distance also saves you money on the underground trench.
Look up before you finalize the location. Tree branches can drop sap or fall on the roof during a storm. Leave plenty of space around all four walls. You need room to swing a hammer, paint the siding and clean out the gutters.
Attach gutters to the shed roof to control the rain. Direct the downspouts away from the foundation. Puddles under the floor joists can encourage mold and pests.
Seal and insulate the walls and ceiling
You need insulation to keep the room warm in winter and cool in summer. An uninsulated shed can turn into an oven in July and a freezer in January.
Start by sealing gaps. Look for daylight around the roof edges, windows and door frames. Fill small holes with expanding foam, and run a bead of exterior caulk along the window trim. A tight seal stops drafts and keeps insects outside.
R-value measures how well a material resists heat flow. Higher numbers mean better insulation. Standard walls hold basic fiberglass batts. A ceiling built with thicker rafters holds thicker, higher-rated batts.
Install fiberglass batts in the wall cavities. Press the batts between the studs without crushing them. Compressed fiberglass can lose some of its insulating value. Use a utility knife to cut the batts to fit around electrical boxes and wires.
In cold climates, builders often staple a plastic vapor barrier over the interior side of the studs. This helps stop warm, moist indoor air from condensing inside the cold wall cavity. Check local code first, as vapor barrier rules vary by climate.
Ceilings often need airflow to limit moisture problems. Staple foam baffles to the underside of the roof decking between the rafters. The baffles create a channel for air to travel from the soffit vents to the roof ridge. Pack fiberglass batts or rigid foam boards below the baffles.
Do not forget the floor. Cold winter air constantly circulates under a raised shed. Cut rigid foam board to fit snugly between the wooden floor joists, and secure the foam blocks with heavy construction adhesive. Lay plywood over the joists to create a solid subfloor.
Run underground power with an electrician
Hire a licensed electrician to connect your shed to the main house panel. Running heavy underground lines carries high risks. An electrician helps make sure the setup meets code and handles your equipment load safely.
Some electricians let you dig the trench yourself to save money, if local rules allow. Call the national 811 dig line before you dig, and ask how much notice your state requires. Utility companies will paint lines on your grass to mark buried gas, water and power lines. Hitting a buried line with a shovel can be dangerous and costly.
Ask the electrician how deep the trench needs to be. Local building codes dictate specific minimum depths for PVC conduit and direct-burial cable. If you dig, the professional lays the pipe and pulls the heavy wires.
Plan your outlets before the electrician arrives. Map out where you will put the desk, monitors, chargers and heater. Consider an outlet on every wall and let the electrician set the final layout. Ask the electrician about a dedicated circuit if you plan to run heavy power tools or an air conditioner.
Your electrician might suggest a subpanel. A subpanel mounts inside the shed. It takes one thick cable from the house and splits the power into smaller circuits for your lights and outlets. A subpanel gives you local breakers you can reset without walking back to the house in the dark.
Bring internet out to the yard
A home Wi-Fi signal rarely punches through exterior house walls, yard space and shed insulation. You need a physical cable for reliable video calls and large downloads.
Ask your electrician whether an Ethernet cable can share the trench with your power line. Burying direct-burial Cat6 cable gives you a fast, stable connection. Check local rules on separating data cables from power lines. You may need to run a second PVC conduit in the trench for low-voltage wires.
Terminate the Ethernet cable at a wall jack inside the office. You can plug your computer directly into the jack for the fastest speeds. Copper cable works well across typical yard distances. If the shed sits far away, ask a low-voltage technician about running fiber optic cable.
If you want wireless internet for a phone or smart speaker, plug a Wi-Fi access point into the new wall jack. The access point broadcasts a strong, dedicated signal inside the room. A mesh network node works well on a desk.
Heat and cool your small room
Climate control makes the space usable for long hours. ENERGY STAR lists additions and outbuildings such as a shed or garage, where extending ductwork is difficult, as a good fit for ductless mini split heat pumps.
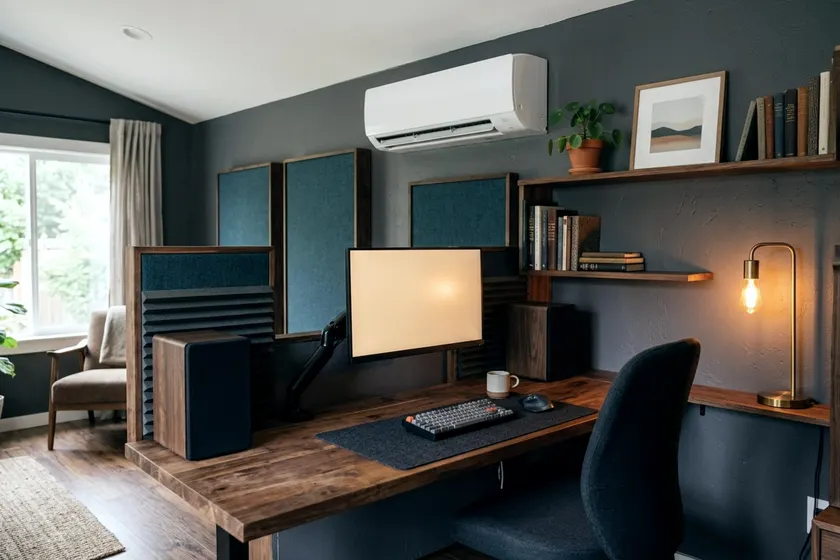
A mini split puts a compressor outside and a quiet blower on the wall inside. It heats and cools the room. ENERGY STAR says certified mini splits use up to 60% less energy than standard home electric radiators. They can cost more to install upfront, but they run quietly and may lower your electric bill.
A portable space heater can work for occasional use on cold mornings. The CPSC advises keeping portable heaters at least three feet from drapes, furniture, bedding and other combustible materials.
Always plug a space heater directly into a wall outlet. Extension cords can overheat and start fires under heavy continuous loads. Most residential space heaters draw high power, which can max out a standard circuit if you run other devices at the same time.
For summer days on a tight budget, a small window air conditioner does the job. Check with a contractor before cutting a new opening in a wall. Caulk around the unit to block warm air from creeping in.
Finish the inside for daily work
Cover the insulated studs with drywall. Drywall dampens sound and creates a flat surface for paint. You can hang plywood or oriented strand board if you want an industrial look. Wood panels let you drive a nail anywhere to hang heavy shelves.
Mud and tape the drywall joints. Once the compound dries, sand the seams flat and wipe away the white dust. Prime the bare walls before you roll on the paint. A light color reflects sunlight, which makes a small space feel bigger.
Snap luxury vinyl planks over the subfloor. Vinyl resists spilled coffee and wet boots. It clicks together in an afternoon and handles changing temperatures better than solid hardwood. Install baseboards along the floor to hide the expansion gap in the vinyl flooring.
Keep the ceiling clear by installing flush-mount LED lights. Pendants hang down and get in the way in a room with a low roof. Frame the windows with wood casing to hide the rough drywall edges. Add a simple desk lamp to throw light directly onto your paperwork.
Decide your ideal desk height before you arrange the furniture. Place the desk so you face the door or a window. Situate the computer monitor so natural light hits it from the side. Sunlight from directly behind you creates glare on the screen.
Bring in furniture that supports your back. Take time to pick an ergonomic office chair for long hours at the computer. Add a thick rug to reduce echo during your meetings. If the bare walls still ring when you talk, read up on how to soundproof the room with acoustic treatments.